Comet64 Ethernet Card... WITH CASE!
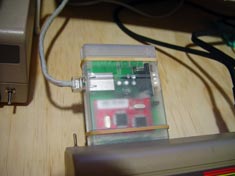
Finished Comet64 Ethernet card with custom cut clear plastic expansion port cart shell.
I've been busy hacking away at stuff, taking pics along the way. I only found the USB cable for my camera today, so starting to create posts for projects I've been working on. This is actually the 10th little project for my C64, but Greg at commodoreserver.com was anxious to see the clear plastic case mod 
*click images for full sized version
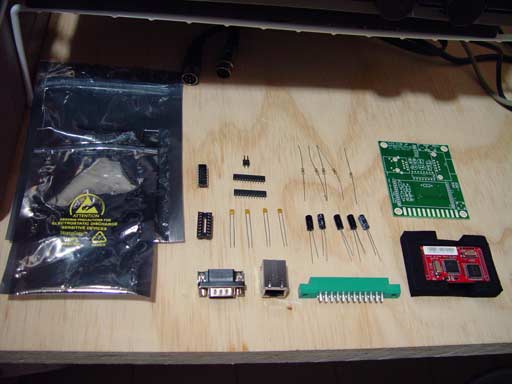
My Comet64 w/serial connector kit arrived 6/1/11.
I had it soldered together in just under 1 hour!
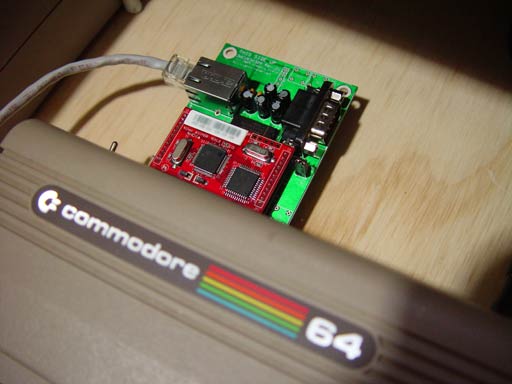
I soon had it plugged into my C64 user port and connected to my Apple TimeCapsule via Ethernet cable
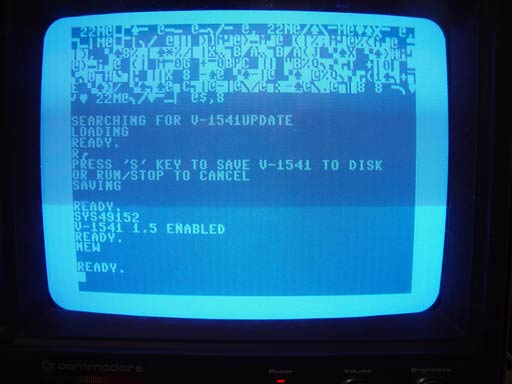
The printed instructions told me to put in my v1541 disk & type: load"v-1541update",8 and run it, following the prompts on screen, so I did.... Can't describe how cool it felt to see those characters fill the screen buffer, knowing they were coming over the Internet via Ethernet to my 28 year old Commodore! Priceless.
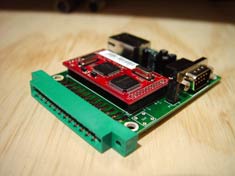
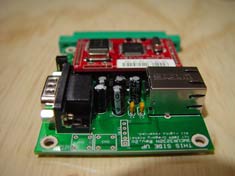
Some time in the last 11 days, AgentFriday and I talked about the comet64 looking like it might fit in a standard expansion port cartridge shell. After an hour or so of serious, close-up dremel action, I can tell you it does!
This particular case has a single screw right smack dab in the center of the case. Of course, this wouldn't work with the Comet64's circuit board, so I have it held together with rubber bands at the moment. I will probably put a tiny dab of modelers glue in each corner to keep 'er together. I should be able to "pop" it apart in the future if need be.
I am very happy indeed with my Comet64 Ethernet card! I know AgentFriday is close to cracking the 2,400 baud speed barrier and should have it upwards of 38.4k or 56k soon.
But WAIT! There's MORE!...
Greg noticed I hadn't taken any pics showing how the cart case fits against the user port connector or against the back of the C64,  so I had to bust out the camera and take some new pics. I figured I might as well glue the case together so I could take off the rubber bands and grab some right proper pics. At the last second, I decided to cut up some round, white erasers (from an old mechanical pencil) for feet. They are exactly 1/4" tall and keep the cartridge nice and stable and flat when plugged into the computer. The only thing missing now is a stick on label!
The black cable plugged into the serial port is just a regular joystick connector so you can see what it looks like with a cable connected.
More projects, pics & posts coming soon!




Leave a Comment
You must be signed-in to post comments.Responses
Goog 6/13/2011
Hehe- that looks great! I tried to make one today... it doesn't look nearly as good as yours, so I won't be posting a picture of it any time soon. :)
RandyInLA 6/13/2011
Thanks Goog! I still want to see what you came up with.
If anyone else is interested, I got the clear shells from eBay user freeweb. I just checked his "other items for sale by this member" and it looks like he doesn't have any more left. However, I found some at Vesalia Online: http://www.vesalia.de/e_c64cartshell.htm that have a different molded pattern on the outside than the one I used, but they still have a single screw in the center. I'm sure a little Googling would reveal other locations to pick up cart shells.
I just noticed that all the images on this page are the actual, large file sized versions. I assumed since the image posting widget allowed me to change the dimensions that it was rescaling them down as well. That's a lot of bandwidth (35.5MB) for each page render, so I'll probably create smaller file-sized jpgs and replace these small versions with those, leaving the links to the full-sized ones if someone wants to see them.
Fritske 6/14/2011
that looks really awesome man
Frankencelery 3/11/2013
How did you make such clean cuts in the case? I just tried this over the weekend, and like Goog said on his almost two years ago, I "succeeded", but I certainly wouldn't take a picture of it. It was a functional success (barely) but an aesthetic disaster! I'm also wondering if maybe the height of the Comet64 hasn't changed a bit since you did your project. from top to bottom, the ethernet port does not fit in the case. I ended up scraping at the bottom of the case to make room for the plastic mounting pins and solder pins, and the top only goes on with a bit of pressure. Also, my board was too wide for the case, which yours didn't seem to be. I ended up using the dremel along the bottom edge of the case so the board would slide in, which it doesn't look like you had to do either.